DIY Cable Management Hacks for Home Office
DIY cable management for home office starts by repurposing small boxes to hide cords. Drill holes in the boxes for efficient routing and label each hole or box for easy identification so you can quickly find the right cable.
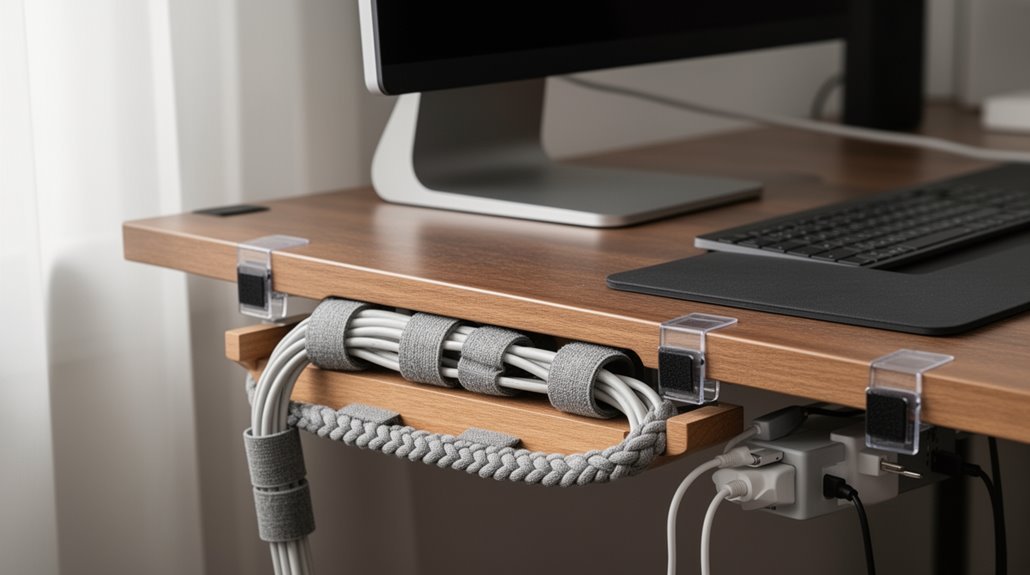
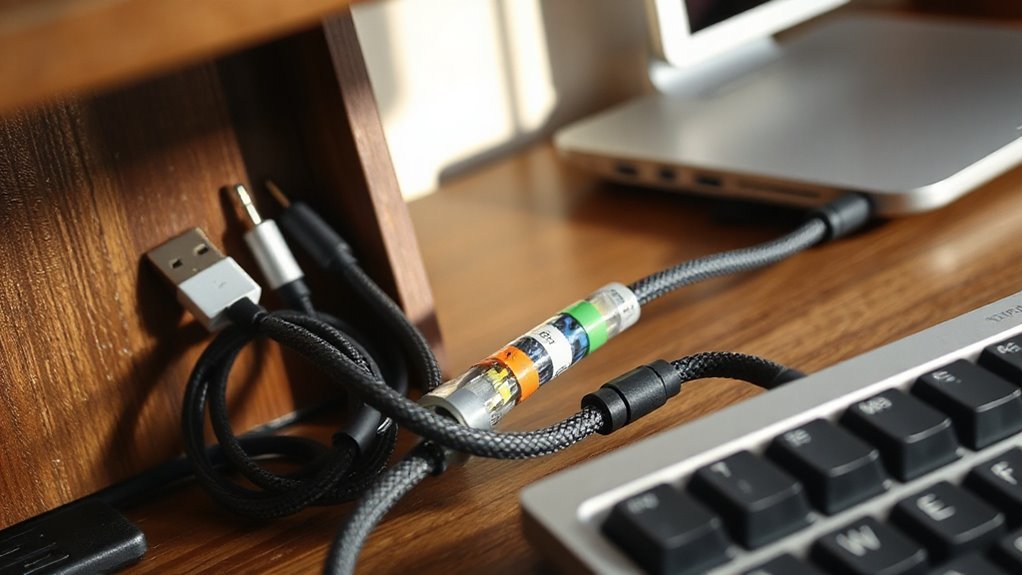
Use adhesive clips to keep cables secured along walls, the back of your desk, or the underside of shelves to prevent tangling. Bundle groups of cords with cable sleeves or Velcro ties for a much neater appearance.
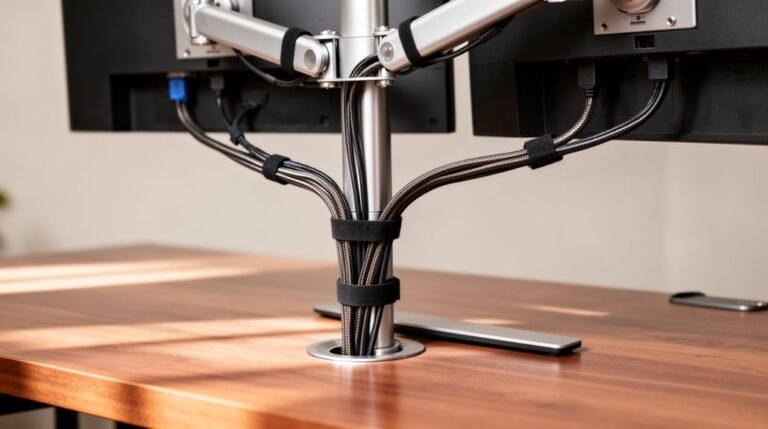
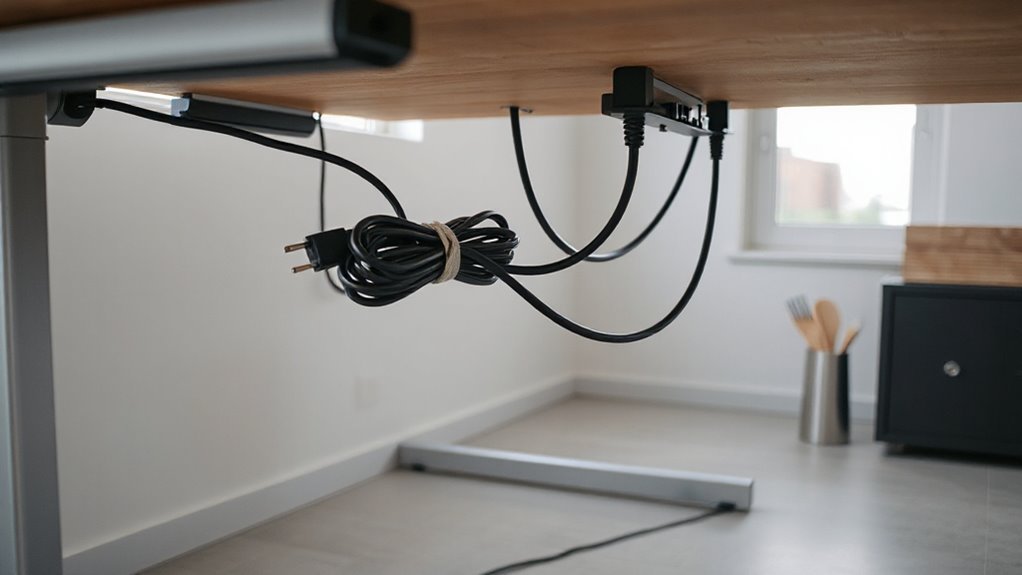
Install a cable tray under your desk to consolidate wiring and keep everything off the floor. Make sure to leave proper slack for adjustable furniture so cables don’t get stretched when you move the desk.
These simple techniques improve organization and safety in your home office and create a clean base if you decide to adopt more advanced cable management solutions later.
Repurposing Boxes for Cable Hiding
Repurposing boxes for cable management can transform cluttered spaces into organized areas. Small boxes or shoeboxes serve as excellent foundations for your cable management system. They offer budget-friendly solutions compared to commercial options. To guarantee efficient cable routing, drill or cut holes in boxes tailored to specific cable diameters. Place holes strategically to prevent tangling while allowing organized routing. Multiple holes facilitate separation of power and data cables. Label each hole for easy identification of devices. This approach maintains a clean appearance by routing excess cable length through designated openings, streamlining your workspace. Utilizing DIY solutions for organizing cords can enhance the effectiveness of your cable management strategy.
Effective Cable Bundling Techniques
Effective cable bundling techniques play a pivotal role in maintaining an organized workspace. Use cable sleeves to group multiple cables into a single bundle, giving a professional look. Flexible cable wraps allow you to rearrange or unplug devices without disassembling the entire setup. Velcro ties are adjustable and reusable, perfect for temporary bundles. Avoid over-tightening ties to prevent damaging insulation. Consider cable trays installed under desks to consolidate and route cables efficiently. Raceway channels offer discreet routing and protection from tangling. Utilize adjustable cable clamps for easy modifications, while fixed organizers neatly line up cables. Finally, maintain proper slack to accommodate adjustable desks and avoid tension that could damage cables, ensuring smooth movement and accessibility. Proper cable management enhances productivity and safety in your workspace.
Utilizing Adhesive Clips for Organization
Adhesive clips serve as a practical solution for organizing cables in any workspace. Made from durable materials like TPR rubber, plastic, or metal, these clips cater to different needs. TPR rubber clips provide flexibility and grip, while plastic options are lightweight and cost-effective. Metal clips offer enhanced strength for heavier cables. These clips adhere to various surfaces, including desks and walls, maintaining ideal adhesion when surfaces are clean and dry. You can install them horizontally or vertically based on your cable routing preferences. Positioning clips near entry/exit points minimizes slack, while evenly spaced clips prevent sagging. Most clips allow repositioning within the first 24 hours, but their adhesive strength diminishes after removal, limiting reusability. Proper cable management not only enhances the aesthetics of your workspace but also ensures the safety and longevity of your devices.
Creating a Labeling System for Cables
Creating a labeling system for cables can greatly enhance organization and efficiency in any workspace. With the right approach, you can quickly identify and manage your cables.
Here are four effective methods to take into account:
- Handwritten Labels: Use permanent markers on cables or painter’s tape for temporary labels.
- Mailing Labels: Wrap folder labels around cable ends for dual-end identification.
- Thermal Labels: Opt for smart Bluetooth label makers to create durable, waterproof labels.
- Heat Shrink Tubing: Apply heat shrink labels to guarantee permanent, tamper-resistant identification.
Implementing these options can streamline your workspace, reduce clutter, and improve your overall productivity.
Choose the method that best fits your needs and keep your cables organized efficiently.
Building Under-Desk Cable Management Solutions
When you’re looking to optimize your workspace, under-desk cable management solutions present a straightforward way to keep cables organized and out of sight.
Consider using cable trays, which securely mount under your desk and hold bundles of cables. Cable racks, available in various sizes, offer easy access and visibility. Integrated cable channels can accommodate multiple power outlets, allowing you to conceal cables neatly.
For excess cable length, organizer boxes reduce clutter. Hook-based organizers provide multiple hooks for coiling cables and shelves for devices. Most products attach using screws, ensuring stability. Some include templates for precise installation, making setup easier.
Choosing the right solution improves safety and reduces visible wire tangles, contributing to a more productive workspace.
Modular Alternatives for Cost-Effective Management
Modular alternatives provide a flexible and cost-effective solution for cable management, making it easier to adapt to changing workspace needs.
Consider these options for effective management:
- Modular Power Systems: Systems like Legrand’s ModPower offer customizable configurations, with integrated charging ports for various devices.
- Cable Management Kits: Universal kits feature adjustable trays and smart straps, allowing secure organization of multiple cords under desks.
- Cable Raceways: Snap-together raceways conceal cables along walls or desks, reconfigurable for new setups without a complete overhaul.
- Clips and Holders: Modular clips attach to surfaces for routing cables, made from durable materials to guarantee long-term usability.
These alternatives help reduce costs while maintaining a neat and organized workspace.
Routing Cables for a Tidy Workspace
Routing cables effectively creates a tidy workspace, which enhances both aesthetics and functionality.
Start by identifying devices and evaluating cable types, like power and data. Determine ideal paths close to desks or walls, reducing clutter. Map connections to enhance accessibility, while avoiding overlaps and tangles. Choose a single route to centralize cables, such as directing them to an under-desk power strip tray.
Use under-desk cable trays or raceways to conceal cables and keep them organized. Secure a power strip inside the tray, positioned at the rear. Employ adhesive clips or Velcro straps to anchor cables along the desk’s underside.
Finally, regularly test cable slack, especially when adjusting desk height, to prevent strain and guarantee smooth movement.
DIY Accessories for Enhanced Cable Control
Effective cable management can greatly improve your workspace efficiency. Consider these DIY accessories for enhanced cable control:
- Cable Management Boxes: Use shoeboxes or wooden boxes to conceal power strips. Cut holes for cable entry and exit, ensuring accessibility while hiding clutter.
- Binder Clips: Repurpose binder clips as cable holders by securing them to desk edges. Thread your cables through the handles for neat organization.
- Wire Baskets: Mount plastic gutters or metal utensil holders under your desk for cable containment. Secure them with cup hooks for durability.
- 3D-Printed Accessories: Utilize modular pegboards and 3D-printed components for customizable cable clips. These allow easy adjustments to fit various cable sizes.
Implementing these solutions can markedly enhance your cable management, creating a safer and more organized workspace.
Organizing Charging Stations Efficiently
Organizing charging stations efficiently can streamline your daily routine and reduce clutter. Start by selecting accessible locations like desks or nightstands.
Consider installing multiple stations across your home for ease. Measure your devices to decide on horizontal or vertical placements, prioritizing frequently used gadgets.
Use multi-device charging docks that incorporate cable management features and invest in varying cable lengths to minimize slack. Employ power strips with surge protection for safety.
Keep cords organized with clips or Velcro straps, and label each cable for clarity. Group similar devices together in designated compartments to prevent tangling.
Finally, confirm your stations are near power outlets to reduce cable lengths and maintain safety.
Frequently Asked Questions
How Do I Choose the Right Cable Management Box Size?
To choose the right cable management box size, first measure the space available under or beside your desk.
Count the devices and cables you need to manage, factoring in the size of power strips.
Select a box that’s at least 5 inches tall to accommodate power adapters.
Guarantee the width fits between desk legs and allows for chair movement.
Consider future device additions when determining the box’s overall dimensions to guarantee capacity.
Can I Paint My DIY Cable Management Solutions?
Yes, you can paint your DIY cable management solutions.
First, clean the surface with rubbing alcohol to remove dust. Lightly sand the raceway for better paint adhesion, then clean again.
Apply multiple thin coats of standard wall paint for even coverage, matching the wall color for a seamless look. Confirm proper drying time between coats and before installing cables.
This method maintains cable protection while enhancing the aesthetics of your space.
Are There Eco-Friendly Materials for Cable Management?
Yes, several eco-friendly materials exist for cable management.
Bamboo, a renewable resource, offers durability and biodegradability. Cork provides a lightweight and sustainable alternative, while jute and cotton wraps securely bundle cables.
Additionally, sustainably sourced wood creates long-lasting organizers. Recycled plastic ties and reusable nylon straps minimize waste.
Silicone and recycled fabric wraps further enhance eco-friendliness.
These materials collectively reduce environmental impact, ensuring effective cable organization while promoting sustainability in your workspace.
How Often Should I Reorganize My Cable Setup?
You should reorganize your cable setup every 3 to 6 months. This frequency helps prevent tangling and reduces trip hazards.
Look for signs like visible clutter, difficulty accessing cables, or unused wires. Regular checks improve cable lifespan by minimizing strain.
Schedule reorganizations after tech upgrades or seasonal changes. Keeping a clean workspace enhances efficiency and reduces electrical hazards.
Document changes for future reference to streamline your setup further.
What Tools Do I Need for DIY Cable Management Projects?
For DIY cable management projects, you’ll need several essential tools.
Start with wire cutters for precise trimming, and wire strippers for insulation removal. Use screwdrivers or drills to mount organizers securely. A measuring tool guarantees accurate placement.
Consider hot knives for sealing cable wraps. Don’t forget cable ties for bundling, clips for attachment, and trays for under-desk storage.
These tools streamline your setup, creating a cleaner and more efficient workspace.
Conclusion
Incorporating these DIY cable management hacks transforms your workspace into a streamlined environment.
Think of your cables as rivers; with proper routing and organization, they flow smoothly without creating cluttered landscapes.
Utilize boxes, clips, and labels to maintain order. Implement under-desk solutions for easy access while keeping surfaces clear.
By taking these steps, you enhance both functionality and aesthetics, ensuring an efficient home office that promotes productivity and focus.